Posts

Affinity Revolution

Image
 There's been lots of traffic on various sites about the new look of Affinity Photo, Affinity Designer and Affinity Publisher, three useful products created by the firm Serif. October 30, 2025, a year and a half after the Australian company Canva purchased Serif to expand its professional software design product line, Affinity, version 3, was released. All three apps are included in the new Affinity. Each one is designated as a Studio, and the user can easily switch among the three. The three icons for Photo, Designer and Publisher have been replaced by one unified symbol. The new product is impressive. Speed and versatility second to none will probably make it rank as the best new application of the year. However, for users of the previous Affinity apps, there will be a significant learning curve. Virtually all of the old functions, plus new capabilities, are there, but the tools are hard to find.  The user interface for the Affinity Photo Studio is simple enough when the ima...

Brightin Star 35mm f9.95 M43 manual focus lens

Image
I have been an Olympus/OM System micro four thirds user for many years. I love the format, cameras and lenses for many reasons, including the small size, light weight and quick automatic focus. But I also enjoy photographing some subjects with third-party, manual-focus primes on my Olympus E-M5 and E-M1, taking me back to the days of shooting film with less-sophisticated cameras. But the manual-focus primes are best for portraits and still-life shots, not for anything involving action. My first venture into the manual-focus lens world was an adapted used and cheap lens from an old Olympus film camera. Not satisfied with the speed, I stepped up to a new and expensive Voigtlander Nokton f0.95 17.5mm lens.  The robust lens produced images with a unique character, which I loved. The well-built he lens was big and heavy, which I did not like. It was like a having military tank mounted on the front of the camera.  Here's a shot from the lens, stylized to give it a black and white fi...

Refinement with Textures

Image
 Using texture overlays is a great way to add character and flair to the final processing of some images. Traditional processing cannot produce the eye-catching distinction achieved with the superimposition of a texture onto a digital photograph. You can produce your own textures by photographing interesting natural textures, but there are many sources of textures online, too. So, why spend time re-inventing the wheel when it's already rolling for you. Shot of a pool with a Texture Bite added. My favorite online source is the Texture Bites package from Photomorphis. Each Bite design comes as a four-layer Photoshop file. Three layers are textures, and the other layer is used to direct placement of your original file within with the texture files. Antique International Harvester Roadster shot at the National Automobile Museum. Texture Bites brings distinction to this image. Open your image in your photo editor capable of handling layers. Then open the Texture Bites file and copy all ...

Using the Olympus OM-D E-M5 iii

Image
I love using modern software to stylize digital images, and you don't have to travel to Switzerland to get interesting nature photos for that work. Here are some of my latests shot with the Olympus OM-D E-M5 iii and the M.Zuiko Digital 17mm f1.8 prime lens. A view of a pocket park in a Round Rock, Texas neighborhood. 200 iso f9 1/400 sec, ON1 Photo RAW 2025 MAX Here is a Rock Rose, cropped for close-up. 200 ISO f3.5 1/250 sec, ON1 Photo RAW 2025 MAX: Color Film - CF10 Fujifilm Velvia 50 Sometimes adding a texture gets a distinctive look. Cropped for close-up. 200 ISO f1.8 1/4000 sec, ON1 Photo RAW 2025 MAX: Inked texture In the park I spotted what's left of a personal-size flag tangled in the limbs of a dead shrub. Cropped for close-up. ISO 200 f1.8 1/250 sec, ON1 Photo RAW 2025 MAX: masked, filter - High Key B&W Warm. Adjacent to our building are several crape myrtle shrubs in bloom. Here's a close-up with faux-film stylization of one of my favorite black and white fil...

New Views with Something Old

Image
 A few months ago I did a bit of camera and lens trading/buying to return to the basics of the micro four thirds format: smaller is better. I acquired a very good, used Olympus OM-D E-M5 Mark III camera and an excellent-condition Olympus M.Zuiko Digital 17mm f1.8 lens. E-M5 iii with M.Zuiko Digital 17mm f1.8 and Olympus LH-48B lens hood. The used lens, introduced in December 2012, actually came with an Olympus-branded lens hood. Now that I am a "senior" -- old -- and use a cane for walking, I need to have my camera attached to a neck strap, often shooting with one hand. This combination is perfect for that. The 17mm is now my "normal" lens. Cropped image shot with the M.Zuiko 17mm f1.8 on E-M5 iii. I sold my Panasonic Lumix DG Summilux 12mm f1.4, which I acquired soon after it was released in 2016. It is one of the best prime lenses in the MFT lineup, but it was just too bulky and heavy for an old man to deal with. Replacing it was the M.Zuiko Digital 12mm f2.0. Bot...

"Love Is in the Air"

Image
 Here's a composite image from a performance of the Enclave Choir, directed by Meg Miller. The show was a collection of love songs and related narrative. Location: The Enclave at Round Rock senior living center, Round Rock, Texas.  The photo was shot using the M.Zuiko 12-100mm F4.0 IS Pro lens on an Olympus E-M1 Mark III camera. In my opinion, this lens is the best zoom lens ever made for the micro four thirds format. The lens was first released in 2016 but never became a big hit because of its size. I purchased the lens soon after its release. At the time, the only MFT camera I owned was the PEN-F, but it had a third-party grip, making it perfect for balancing the heavier lens. With Olympus cameras, the lens adds 2 stops of stabilization, and it had a manual ring clutch for quickly switching from auto focus to manual focus. The  M.Zuiko Digital ED 12-200mm f/3.5-6.3, one of the last lenses in the pipeline before the Olympus camera division became OM System, was designed ...

Enclave Entertainment

Image
 Resident Meg Miller and Entertainment & Programming Director Chris Davidson entertained at a recent The Enclave at Round Rock happy hour.

Phone Frustrations

Image
 Anyone old enough to remember when a government agency, a private company or doctor's office had a live, human being -- once called a switchboard operator -- on duty to answer the telephone? These days in the name of saving money (another way to be seen keeping taxes low or to pad the chief executive's bloated salary) the switchboard operator has been replaced by an expensive piece of equipment generating recorded voice messages. We're usually guided through a menu of directions to "press 1" for this and "press 2" for that. We're instructed to pay attention because "the menu has changed." Stock images from Pixabay.com Then, there are the responses you get after reaching the correct extension. 1. "Leave message" -- In too many offices, returning phone calls is a low priority and is done at the end of the work day. What about the guy who calls at 8:30 in the morning and is in Tucumcari to help his sister at 4:45 in the afternoon, u...

PureRAW now in version 2

Image
 DxO has recently released version 2 of DxO PureRAW, an automated tool that prepares raw files as DNGs for work in your favorite photo editor or outputs JPGs ready for uploading to social media or your image archives. If you are not familiar with the original PureRAW, the app borrows some of the features in DxO PhotoLab Elite, the highly-regarded raw converter, to automatically produce demosaicing, denoising, optical correction and lens sharpening of raw files. Noise reduction choices include Noise Reduction HQ, Prime, and perhaps the best noise reduction on the market, DeepPRIME. DxO says you can gain up to two stops in low light because of ability to clean up the noise. DxO PureRAW can speed the workflow in your process of achieving the best quality rendering of raw files.  Version 2 of PureRAW contains three new features:  support for a Lightroom workflow, including a Lightroom plugin,  support for a Mac Finder/Windows Explorer workflow and  support for Fujif...

Adding Thumbnails to ON1 Photo RAW Preset Categories

Image
I recently discovered a posting by an amateur photographer on YouTube with directions for changing or adding thumbnails to preset categories shown in the left Presets tab of ON1 Photo RAW 2022.1. I was interested because I have collected a lot of these presets in recent years while using Photo RAW.  This screen grab of the ON1 Photo RAW Browse module shows the way preset categories (the two columns on the left) are displayed. The two generic squares outlined in yellow are older categories with no thumbnails.  Older preset categories and some new ones from third-party providers have no thumbnails, and it can become a bit more difficult with so many generic squares displayed. The YouTube directions identified a method to add thumbnails to the preset categories, but the procedure was complicated. It did not work sometimes. Dylan Kotecki, online trainer for ON1, posted this video about using and modifying presets in an earlier version of Photo RAW, but he did not cover the topic ...

Vexation of Photo Editing AI

Image
 As an amature photographer interested in composites and image stylization, I love the use of machine learning/artificial intelligence now being incorporated in editing software. It speeds the workflow tremendously, but some features still need a little work. One of those is sky replacement. The software I use now does a good job of recognizing tree branches, leaves and large buildings sticking above the horizon. However, when it comes to automatically masking thin metal framework or structures like windmills extending into the middle or top area of the image, the software still needs more time in the classroom. The image below is a good example. Both ON1 Photo RAW 2022.1 and Skylum Luminar Neo Early Access masked the trees successfully, however they badly blew proper recognition of the blades and tower of the wind turbine, requiring a significant amount of time to correct. A second area of AI/ML problems is replacement of utility lines. Skylum Luminar Neo -- now with a limited-fea...

Early Access Version

Image
 The folks at Skylum Software have released what they call an Early Access Version of Luminar NEO to customers who have advanced-purchased this new software. This decision puts Skylum in the category of software publishers who promote public "beta" testing of forthcoming versions. Serif's Affinity products and Computer Insel's PhotoLine are two apps testing this way for a long time. Skylum's primary purpose of Early Access is to seek feedback on their Relight AI, Dust Spot Removal AI and Power Lines Removal AI features. In addition, the early access will help quiet criticism of the company for failing to meet the earlier announced release time of last month. For those of us eager to get our hands on the product, it's a chance to finally see how at least part of the product will work. Early Access is missing layers and numerous other features coming later, but based on my experience with free stock photos and my own raw images shot with Olympus cameras, I am im...

Frustrations and Delays

Image
ON1 Photo RAW 2022 I had been looking forward to the December 20th update to ON1 Photo RAW 2022. Improvements and fixes were promised, including tweaking of the sky replacement tool. ON1 Photo RAW has been my primary start-to-finish raw file converter and editor for over a year now. However, several weeks ago Photo RAW began to crash on my 2017 iMac. ON1 support provided me with instructions for the time-consuming uninstall-and-reinstall process to get it working again. However, they could not replicate my crashes with the sample files and logs I sent them. Support indicated because ON1 is a small company, they could not spend more time trying to solve my problem. What I discovered was the digital asset manager I had been using -- Photo Supreme -- altered the Firmware cell in the EXIF data to read "Photo Supreme..." in JPG and TIF images. When ON1 encounters one of these JPG images, it shuts down. Using the Batch processor in ACDSee Photo Studio for Mac 8, I have been able to...

Final Corner for My Holy Trinity

Image
 Just figure me as an oddball. I don't subscribe to the Olympus micro four thirds trinity of prime lenses: 17mm f1.2 PRO, 25mm f1.2 PRO and 45mm f1.2 PRO, even though I desire the beautiful depth of field achieved with primes. These fast, weather-sealed, expensive lenses produce images with feathery bokeh and cover the slightly-wide, normal and portrait ranges. But the high prices and angles of view are not quite right for my needs. Plus packing all three of these glass-heavy lenses is less than ideal for traveling. Despite the steep price, I purchased the Olympus M.Zuiko 25mm f/1.2 PRO -- the normal view -- soon after it was released, replacing my slower M.Zuiko 25mm f1.8.  The f1.2 PRO works well on my Olympus E-M1 III camera and my Olympus PEN-F if a third-party grip is attached for better balance. The field of view of the Oly 25mm Pro is 47-degrees, arguably close to that of a human eye. By the time of this purchase, I had established the f-stop of 1.4 as the fastest neede...

macOS Monterey and Pixelmator Pro

Image
 Version 12.0.1 (Monterey) of the macOS provides the infrastructure for many of the powerful features available in the newest version of Pixelmator Pro. To use some of them, you don't have to be running Pixelmator Pro. They can be accessed from Finder utilizing macOS Shortcuts. One of my Pixelmator favorites is Remove Background with Quick Actions in Finder. Here's a free image taken by photographer Alessia Chinazzo and made available on Unsplash. To remove the background using the magic of Pixelmator Pro, in Finder navigate to the folder with the photo and select it. Right-click and scroll down to Quick Actions, then Left-click on Remove Background.  The machine learning tool in Pixelmator Pro begins working its magic. The time this operation takes depends on the speed of your system and the size and complexity of the photo selected. On my iMac, removal of the background of this JPEG took just a few seconds. And there it is -- a transparent image of the subject with the backg...

Pixelmator Pro for Mac

Image
 I have just discovered an image app that may completely replace and streamline my photo editing workflow. It's Pixelmator Pro 2.3 Abracadabra , just released earlier this week. Pixelmator's graphic, introducing the latest version of this Mac-only image editing app. Making the transition to a Mac from Windows a few years ago, I stuck with the traditional multi-platform image editing software when I moved to my new system. I found alternatives to Adobe Photoshop and Lightroom, but they were all available for Windows, too. I saw an occasional reference to Pixelmator, but paid little attention because it was Mac only. Little attention until I recently watched a YouTube video  by Austin photographer Jim Nix. I purchased Pixelmator Pro a few days ago at a Black Friday sale price of about $16 USD. Normally the price is $39.99 USD, still a bargain for this powerful application. Layers-based Pixelmator Pro does all that most amateur photographers need and most of what all enthusiast a...

ACDSee Photo Studio for Mac 8

Image
 ACDSee has just released the latest version of its DAM/Editing software for Mac -- ACDSee Photo Studio for Mac 8. Back when I had a Windows-based computer, I relied on ACDSee for my image database management and much of my image editing. Switching to an iMac, I was disappointed with the ACDSee offering for that platform, because most of the helpful editing features of the ACDSee Windows suites were missing.  Version 8 for Mac makes up for some of that with the inclusion of two significant tools introduced on the Windows side last year -- Color Wheel and Tone Wheels. The wheel adjustment concept originated with Capture One developing software several years ago and has been adapted by some competitors, including ACDSee. The ACDSee Photo Studio for Mac 8 implementation is excellent. The Color Wheel on the left has identified the original blue hues of the knobs on the right and replaced them with green hues without altering the other colors in the photo. Quick and easy! The Tone...

OM System Launch

Image
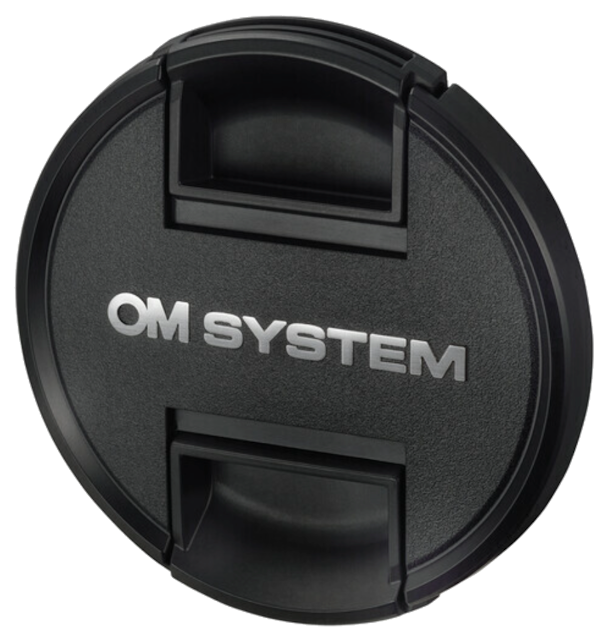
 I'm amused by the online discussion about OM Digital Solutions twin announcements this month -- a new brand name for its cameras and lenses and its first lens with that name. Numerous Olympus users are blowing second-guess smoke (nothing new there) over the merits of these two decisions by the new company formed by the venture capital company that acquired Olympus. So, allow me to stoke the fire a bit, too. The lens cap with the replacement branding for Olympus -- OM System First, OM Digital Solutions scheduled an hour-long live-stream program to reveal the name chosen to replace Olympus for its brand of cameras and lenses and to unveil its first lens. Selection of OM System as the new brand name was brilliant. The name links with the work of designer Yohihisa Maitani, who created the Olympus OM System, an innovative and extremely-successful line of smaller and lighter full-frame 35mm film cameras and accessories to compete with Nikon and Canon.  The program itself was a fail...

OM Digital Solutions M.Zuiko Digital ED 8-25mm F4.0 PRO

Image
A few days ago I acquired the new OM Digital Solutions M.Zuiko Digital ED 8-25mm f4.0 PRO lens, replacing three lenses in my micro four thirds kit. (I had to shop around before I finally found a source with the 8-25mm in stock.) This is the first lens marketed by OM Digital Solutions, the name chosen by JIP which purchased Olympus Imaging in January of this year. Priced at just under $1,100 USD, the lens retains the traditional Olympus branding. I have yet to take the 8-25mm on a trip, but I have been well pleased with images captured in my local area. Since its release in late 2016, my travel lens of choice has been the Olympus M.Zuiko 12-100mm f4.0 IS PRO, currently selling for just below $1,300 USD. It has been on my camera on every long-distance adventure, shooting both indoor and outdoor scenes. Unfortunately, architectural and other ultra-wide situations required a lens change, a poor option when traveling with other people or in a tour group. The M.Zuiko 8-25mm f4.0 PRO (left) a...

PhotoLine Stamp

Image
Stamp is a weathered feature in PhotoLine for painting “stickers” on an image to create borders or other decorative effects. This attribute is similar to brushes found in apps like Affinity Photo and ON1 Photo RAW. To apply the tool in PhotoLine, select a stamp, then drag the cursor across the image to add a curved or straight line of various-angled stickers. The Stamp brush can be resized before clicking by CMD+Left Mouse Button and dragging. Use the Intensity slider in the PhotoLine Tool Settings to add a level of transparency, if desired. This is one of the stamps included in PhotoLine, this one representing the app itself. It has been enlarged beyond its optimum size, suffering from a severe case of jaggies. Note the placement of the "i" and the "e" compared to the other letters. An indication that no time was spent on designing this stamp. The sticker concept, once very popular with scrapbookers, originated in version 5 of the old JASC Paintshop Pro, where they...